
Easy Hair Care Tips
 1. Avoid shampoos which contain sodium laurel sulfate, or sodium laureth sulfate as they are harmful chemicals used in dishwashing detergents. They are generally used as they lather easily but eventually dries out your hair. Use a shampoo with gentle agents like ecyl glucose, or decyl glucoside.
3. Never tie your hair strongly as it might weaken hair roots.
4. Excessive tension and dieting undernourishes your hair, making them weaker and dull-looking. Eat the right food with lots of vitamins and minerals for healthy hair.
5. Use wide-tooth combs for curly hair. Brushes can destroy curly hair by tearing them off the scalp.
6. Avoid sleeping in hair accessories like head bands, scrunchies, barrettes.
7. Trim your hair frequently if it is prone to split ends.
8. Wet your hair prior to swimming as the hair will soak up fresh water instead of the chlorinated water. Wear a shower cap when you swim. In case you don't, make sure to shampoo and condition your hair post swimming.
9. Use hair dryers cautiously. Use the cooler option to blow dry. Do not concentrate the dryer on a single spot for more than a few seconds.
10. The best way to dry your hair is to pat it with a towel and allow it to dry naturally.
11. In case of wet hair tangling, use your fingers to detangle the knots.
Waxing Tips
 1. Do a patch test prior to waxing the entire area to avoid any kind of allergic reactions.
2. Whether you do a hot wax or cold wax, make sure that the length of the hair is 1/8 of an inch to ensure complete removal of hair from the shaft.
3. Make sure the skin is squeaky clean and patted dry to get the best results. Remove all cream, oil, or grime.
4. Do not overheat the wax as it might cause skin burn.
5. While removing the wax strip, pull it against the direction of the hair growth parallely and not straight up to the body.
6. Hand massage with lotion or oil on the waxed area soothes the skin.
7. Applying ice pack post waxing is also helpful.
8. Try to prevent exposing the waxed area to sunlight for a minimum of 24 hours or use a good sunscreen with high SPF.
9. Avoid waxing before and during menstrual cycle as the skin is supersensitive during this period.
10. Do not wax on sunburned areas as this might cause the skin to peel off easily.
11. Diabetics and teenagers prone to acne are advised not to undergo waxing.
12. Follow all these tips religiously and you will notice your hair growing softer with lesser density over a period of time.
Foot Care or Pedicure Manual
 Feet comprise the most neglected part in your beauty regimen. Just like your face needs care, so does your feet. In fact, feet require greater care than the face. In many cultures, arrange marriages are fixed not considerint facial beauty but that of the feet. A beautiful foot needs to be pampered. For an easy care at home, check out the following procedures:
1. Pour few drops of shampoo in warm water to immerse your feet.
2. Use a foot filer to shape the nails and take off the dirt from the nail sides.
3. Apply a fruit pack and let it dry.
4. Wash gently and pat dry to massage moisturizing foot cream to nourish your skin.
Home Remedies for Acne and Pimples

Acne is a chronic skin disorder whereby the skin pores become clogged resulting in eruptions and outbreak of cysts or nodules commonly called pimples.
Teenagers are commonly affected by acne. However, it is not confined to any age group. Though not fatal, acne can be quite distressing as it might leave a permanent scar on the affected area.
Before indulging in home remedies, you must try to correct your diet and food habits. Make sure you drink plenty of water and cut down on oily foods to flush out the toxins.
Time Tested Home Remedies
1. Put toothpaste on your pimple before you go to bed, should help reduce swelling overnight. Make sure it is the paste not the gel. One of the most popular acne home remedies.
2. Wash your face twice a day in warm salty water. This should leave your face oil-free without aggravating the acne.
3. Apply a paste of fresh methi (fenugreek) leaves over the face every night for 10-15 minutes and wash with warm water. This will prevent acne, pimples, blackheads, and wrinkles.
4. Place strawberry leaves on the acne; the alkalinity helps to reduce the swelling.
5. Extract juice of one lemon and mix with equal quantity of rose water. Apply this mixture all over the face and let it stay for about half an hour. Wash
the face with fresh water. Follow this routine for 15 days to check acne, pimples and reduces blemishes and scars.
6. Rub fresh garlic on and around pimples. Pimples will disappear without a mark with regular applications.
7. Mix 1 tablespoon groundnut oil with 1 tablespoon fresh lime juice to prevent formation of blackheads and acne .
8. Apply fresh mint juice over the face every night for the treatment of pimples, insect stings, eczema, scabies, & other skin infections.
9. Prepare a mix of ground drumstick pods and leaves mixed with fresh lime juice, and apply on pimples. This is also good for blackheads and dark spots.
Apply a paste of fresh methi (fenugreek) leaves over the face every night for 10-15 minutes and wash with warm water. This will prevent pimples, blackheads, and wrinkles.
10. Mix groundnut oil with an equal amtount of fresh lime juice and apply on face. Leave for 10-15 minutes and wash. It may be applied daily to prevent formation of blackheads and pimples (acne).
11. Apply juice of raw papaya (including the skin and seed) on swelling pimples or acne.
12. Apply fresh lime juice mixed to a glass of boiled milk as a face wash for pimples, blackheads, and cracked skin.
13. Mix lime juice and rose water in equal portions. Apply on affected area. Wash it off after 20-30 minutes with lukewarm water.
14. Apply ripe tomatoes pulp on acne pimples and keep upto 1 hour, then wash.
Make a paste of roasted & powdered pomgranate skin with fresh lime juice and apply over boils,acne, pimple, blackheads and whiteheads.
15. Home face wash for acne: Mix together 1 or 2mls each of the following: witch hazel, tea-tree and sweet fennel essential oils, adding essential oil of geranium for women and essential oil of rosewood for men. Mix with 300mls of water. Shake before use, as the oils will float on top of the water during storage. Dab affected areas with cotton wool two or three times a day. The oils will clean and unclog giving antibiotic-like protection to the skin.
11. Apply fresh lemon juice on the affected area overnight. Wash off with warm water next morning.
12. Add 2-3 tsp. dried basil leaves to 1 cup boiling water. Steep 10-20 minutes. Cool, and apply with cotton ball.
13. Grind orange peel with some water to a paste and apply on affected parts- one of the best acne home remedies.
14. Clean face with cotton wool dipped in rose water 2-3 times a day.
15. Mix 1 teaspoon lemon juice in 1 teaspoon finely ground cinnamon powder and apply on affected areas frequently.
16. Nettle Tea is another solution. This tea has a herb which has some curing power and really works wonders on skin problems. Drink four cups a day to get the full benefit of one of the most powerful acne home remedies.
Home Remedies for Suntan
 Suntan is a recurring problem, especially in Asian countries. People spend lots of money to buy multiple cosmetic products but overlook some simple ingredients available at home. Check out some of the home remedies for suntan.
 1. Mix sugar with lemon juice and glycerin and rub lightly in circular motion on the affected area. This will not only lighten your complexion but also lend smoothness to the skin.
2. Mix 1 teaspoon potato juice, 1 teaspoon of lemon juice and apply it to the affected area.
3. Soak lentil in milk overnight and grind it the next day for a smooth paste. Also add turmeric to the paste. Use this pack at least twice a week for a brighter and blemish free complexion.
4. Sandalwood powder is known to be one of the best agents for tan removal. Make a paste of sandalwood powder and rose water. You can honey if your skin is dry. Wash off when dry and follow it up with a good nourishing lotion or moisturizer.
5. Apply fresh coconut water in case your face shows blemishes.
6. Rub cucumber slices with milk on face. Wash off when dry.
Know which Sunscreen is Right for your Skin

Everyone knows the importance of sunscreen with regard to protect your skin from the harmful rays of the sun. But few know which sunscreen to choose. There are multiple brands with different SPF available in the market, quite adequate to make you confused.
Don't be so. Just keep in mind the following things prior to making your purchase.
- Do not buy a sunscreen below SPF of 15 as this is the minimum standard recommended for every individual.
- Choose the SPF according to your complexion. Fair complexioned people need a higher SPF- a minimum of 30. For Indian summer, an SPF ranging from 50 to 60 would be ideal.

- It is better to avoid sunscreen oils as they hardly provide any sun protection.
- Like your skin, your lips too need sun protection. Select a lip balm with an SPF of 15. In case you have already caused a tan to your lips, rub them with lime juice and sugar granules(till the granules dissolve). This will lighten the tan and restore the color of your lips.
- Always choose a sunscreen that offers you protection against both UVA and UVB rays of the sun. While UVA rays cause skin cancer and sunburns, UVB leads to premature ageing and wrinkles.
- Sunscreen application should be done thoroughly on all the exposed body parts. Gently apply the lotion with upward movements. Reapplication of sunscreen is always recommended after every one hour in case of constant exposure.
- Always remember- even though your sunscreen is water-resistant, it would not last more than 80 minutes. Waterproof sunscreens too lasts a maximum of 60 minutes.
Expert Wedding Makeup Tips
It's your D-day and you want everything to be just perfect! For perfection, you certainly need trained help; and who better can help you than the Expert
herself.
10 Tips for the Ideal Wedding Make-Up
1. Beauty Regime before the big day: To get that glowing, fresh-faced look, there are a few things to consider a few weeks prior to your wedding day.

- A skin and nail care plan should be started about 6 weeks before the wedding.
- Talk to your beautician about having regular facials and manicures.
- Don't get too much sun before your wedding. Sunburns and peeling skin shouldn't sabotage your wedding day.
- Consider Spray-on-tanning , a 100% natural way to achieve a tan. Ask Cristina about Golden Tropics Spray on Tan.
- Don't forget the importance of Body-Mind-Spirit. What's going on inside is just as important to looking good. As you know preparing for a wedding is very stressful and if you are not looking after yourself by not getting enough sleep or not eating properly it will without a doubt show on your face!
- If you are really stressed out consider having a relaxing massage once a week for a month and also a day before the wedding. Burn some relaxing essential oils around the house to help calm your nerves.
- If you are having trouble sleeping try Valerian tea before going to bed, available from most health food shops.
- When you have chosen a make-up artist, organise a trial around 1-2 months before the wedding.
- It is a good idea to have your bridesmaids with you to give their input and also advise what kind of look they want themselves.
- Have pictures from magazines to show the make-up artist various looks that appeal to you.
- Mention if you have any skin problems or allergies etc or if there are any particular ways you wear your make-up.
- If you are having a day-time wedding it is ideal to organise the trial during the day as this will give you a better idea as to how the make-up will look.
- Having pictures of the dresses will give the make-up artist a starting point for designing the perfect look for you and your bridesmaids.
- Fabric swatches of the wedding dress and bridesmaid's dresses and a description of the flowers will also help when choosing colours. The colours should compliment both the dress and the flowers.

- The style you choose for your wedding make-up will ultimately depend on your personal preference, but there are some other factors to consider:
- The time of the ceremony -is it a day or evening wedding? A lighter, more natural look is more suited to a day wedding and a more dramatic look is suited to an evening one.
- What time of year is your wedding? If you are having a Spring/Summer wedding, go for bright, pastel colours. Warm, deeper shades will lend themselves well to a winter wedding.
- Your skin tones and hair colour? There are two colour palettes- warm or cool .
- If you are Blond or fair skinned, cool tones of grey, blue, soft pink and lilac are ideal.
- If you are brunette or olive skinned, warm neutral tones of brown, taupe, burgundy & red are more suited.
- Remember your make up should be a little more dramatic than your everyday make-up as you can tend to look pale and wash-out in photos if your make-up doesn't stand out.
- Foundations with yellow undertones work best with flash photography.
- Keep away from shimmer highlighters as this look will not show up well in photos and give a reflective shine.
- Use a light dusting of translucent powder to prevent any unwanted shine.
- Ask your make-up artist to use a bronzing powder to warm your skin tone and give a natural glow. Place on areas where the sun would naturally hit e.g. Forehead, cheeks and bridge of nose.
- Blush- use more than not enough.
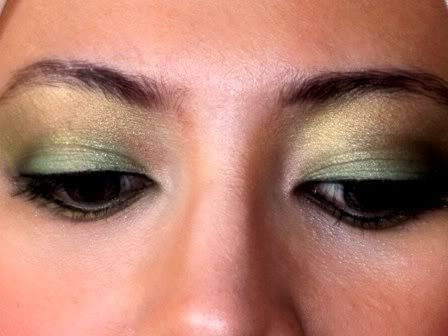
- The eye-area should be soft and natural with no heavy, dark lines.
- Keep away from up to the minute eyeshadows and make-up trends as you will regret it when you look at your photos in years to come!
- Use a brow pencil slightly darker than your hair colour and avoid heavy, dark shadows.

- Use a lip-liner the same colour as your lipstick and avoid a noticeable or dark lip line.
- The colour on your lips will depend on whether you are a warm or cool colour palette (see tip 5).
- It is more flattering to define one area i.e. If you want dark, defined eyes, go for a lighter lip shade and if you want dark/bright lips go for natural, light eyes.
- Ask your make-up artist to arrive as early as possible and allow plenty of time to get the job done. The last thing you want is to be rushed on your wedding day.
- Ask your mum or one of your bridesmaids to carry a powder compact, tissues and lipstick for touch ups during the day.
Oily Skin Care

Most people regard oily skin as a problem. But oily skin is actually a blessing in disguise as age shows much less on oily skin than other skin types. Excessive oil secretion can lead to acne or pimple. Hence, the maintaining the oil on the skin is essential. The treatment may range from simple home remedies to fruit extracts or masks.
